프로젝트중 관리자에서 editor를 사용하여 글작성을 해야하는 요구가 발생 해서 무료인 CkEditor를 사용한 내용입니다.
https://ckeditor.com/docs/ckeditor5/latest/installation/integrations/react.html
React rich text editor component | CKEditor 5 documentation
Learn how to install, integrate and configure CKEditor 5 Builds and how to work with CKEditor 5 Framework, customize it, create your own plugins and custom editors, change the UI or even bring your own UI to the editor. API reference and examples included.
ckeditor.com
리액트에서 CkEditor사용 방법 공식문서의 빠른 시작을 해보니
-설치-
npm install --save @ckeditor/ckeditor5-react @ckeditor/ckeditor5-build-classic
-app.jsx-
import { CKEditor } from '@ckeditor/ckeditor5-react';
import ClassicEditor from '@ckeditor/ckeditor5-build-classic';
function App() {
return (
<div className="App" style={{ alignItems:'center', display: 'flex', flexDirection:'column', justifyContent:'center' }}>
<h2>Using CKEditor 5 build in React</h2>
<div style={{ width:'1000px', height:'500px' }}>
<CKEditor
editor={ClassicEditor}
data="<p>Hello from CKEditor 5!</p>"
onReady={editor => {
// You can store the "editor" and use when it is needed.
console.log('Editor is ready to use!', editor);
}}
onChange={(event) => {
console.log(event);
}}
onBlur={(event, editor) => {
console.log('Blur.', editor);
}}
onFocus={(event, editor) => {
console.log('Focus.', editor);
}}
/>
</div>
</div>
);
}
export default App;
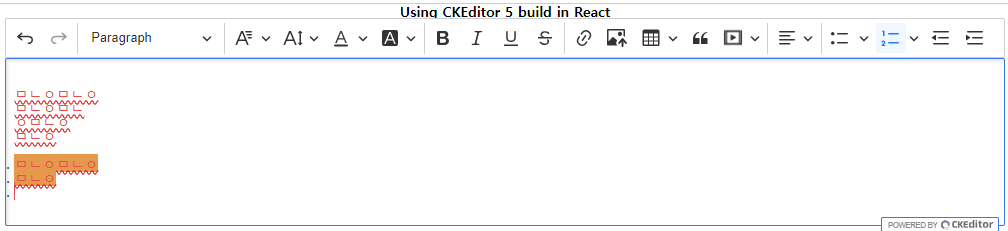
에디터와 기능이 동작을 하지만 css가 적용이 안되는듯 했고 이미지 등록은 안됐다.
그리고 내가 원하는 글자색을 바꾸는 기능은 없었다.
공식문서를 뒤져보니 Document editor라는게 있었다.
Predefined builds | CKEditor 5 documentation
Learn how to install, integrate and configure CKEditor 5 Builds and how to work with CKEditor 5 Framework, customize it, create your own plugins and custom editors, change the UI or even bring your own UI to the editor. API reference and examples included.
ckeditor.com
-설치-
npm install --save @ckeditor/ckeditor5-build-decoupled-document
-DecoupledEditor모드 코드 App.jsx-
import { Component } from 'react';
import { CKEditor } from '@ckeditor/ckeditor5-react';
import DecoupledEditor from '@ckeditor/ckeditor5-build-decoupled-document';
class App extends Component {
editor = null;
render() {
return (
<div className="App" style={{ alignItems: 'center', display: 'flex', flexDirection: 'column', justifyContent: 'center' }}>
<h2>Using CKEditor 5 build in React</h2>
<div style={{ width: '1000px', height: '500px' }}>
<CKEditor
onReady={editor => {
console.log('Editor is ready to use!', editor);
// Insert the toolbar before the editable area.
editor.ui.getEditableElement().parentElement.insertBefore(
editor.ui.view.toolbar.element,
editor.ui.getEditableElement()
);
this.editor = editor;
}}
onError={(error, { willEditorRestart }) => {
// If the editor is restarted, the toolbar element will be created once again.
// The `onReady` callback will be called again and the new toolbar will be added.
// This is why you need to remove the older toolbar.
if (willEditorRestart) {
this.editor.ui.view.toolbar.element.remove();
}
}}
onChange={(event) => console.log(event)}
editor={DecoupledEditor}
data="<p>Hello from CKEditor 5's decoupled editor!</p>"
//config={ /* the editor configuration */}
/>
</div>
</div>
);
}
}
export default App;
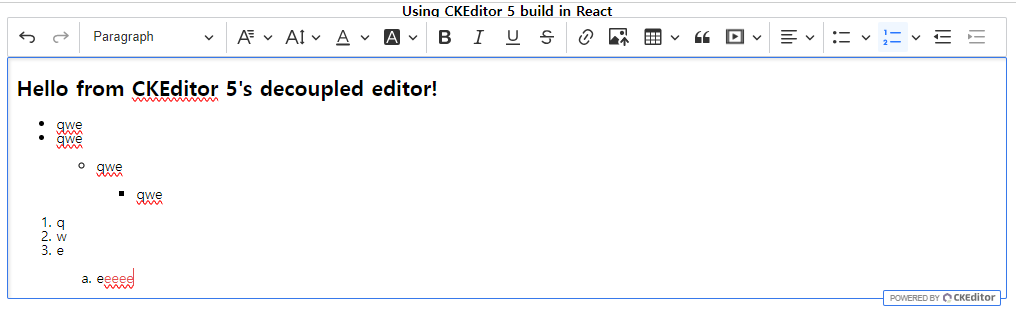
많은 기능이 추가됐고 내가 원하는 색상 변경 기능이 있다.
하지만 들여쓰기 제목 같은부분의 css는 적용이 안됐다.
https://ckeditor.com/docs/ckeditor5/latest/installation/advanced/content-styles.html
Content styles | CKEditor 5 documentation
Learn how to install, integrate and configure CKEditor 5 Builds and how to work with CKEditor 5 Framework, customize it, create your own plugins and custom editors, change the UI or even bring your own UI to the editor. API reference and examples included.
ckeditor.com
해당 문서에 css를 적용하는 방법이 설명돼 있다.
하지만 나는 css reset을 적용중이기때문에 해당 content-styles.css를 만들어 사용했을때 충돌이 나서 적용이 되지않았다.
그래서 필요한 부분만 커스텀하여 사용했다.
-CkEditor/styles.css-
.ck-toolbar {
    flex: 0 0 auto;
}

.ck-content {
    flex: 1 1 auto;
    overflow: auto;
    background-color: #FFFFFF;

}

.ck-read-only {
    padding: 0 !important;
}

.ck-content h2 {
    font-size: 1.5em;
    margin-block-start: 0.83em;
    margin-block-end: 0.83em;
    margin-inline-start: 0px;
    margin-inline-end: 0px;
    font-weight: bold;
}

.ck-content h3 {
    font-size: 1.17em;
    margin-block-start: 1em;
    margin-block-end: 1em;
    margin-inline-start: 0px;
    margin-inline-end: 0px;
    font-weight: bold;
}

.ck-content h4 {
    margin-block-start: 1.33em;
    margin-block-end: 1.33em;
    margin-inline-start: 0px;
    margin-inline-end: 0px;
    font-weight: bold;
}

.ck-content ul {
    margin-block-start: 1em;
    margin-block-end: 1em;
    margin-inline-start: 0px;
    margin-inline-end: 0px;
    padding-inline-start: 40px;
}

.ck-content ol {
    margin-block-start: 1em;
    margin-block-end: 1em;
    margin-inline-start: 0px;
    margin-inline-end: 0px;
    padding-inline-start: 40px;
}

.ck-content a:-webkit-any-link {
    color: #38A5EE;
    cursor: pointer;
    text-decoration: underline;
}

.ck-content blockquote>p {
    margin: 16px 0px;
}
styles.css를 App컴포넌트에 적용하니 잘 됐다.
이미지 업로드
이미지 업로드 기능을 커스텀하여 사용했는데 제공해주는 방법은 비효율적이고 CKBox 와 CKFinder를 사용하라고 권장하는데 해당방법은 유료다.
-간단 요약-
기본 로직
- 이미지 업로드
- back or s3 이미지 저장 & 이미지url return
- ckEditor content의 img src에 return 받은 url삽입
문제점
content에 이미지를 등록했다 지우면 서버에 잉여 이미지가 남게됨
커스텀 로직
- 이미지 업로드
- base64로 변환 후 ckEditor content의 img src에 삽입
- 글작성시 ckEditor content를 element로 읽어 img를 모두 찾아 base64와 매칭되는 이미지file을 formData에 담아 업로드
- 업로드 후 해당url을 content에 교체후 글을 저장
문제점
content를 element로 변환하는 과정에 xss공격을 받을수 있음
해결
dompurify라이브러리로 sanitize()함수를 이용하여 content에 교체되도록함

-App.jsx-
import { useEffect, useRef, useState } from 'react';
import { CKEditor } from '@ckeditor/ckeditor5-react';
import DecoupledEditor from '@ckeditor/ckeditor5-build-decoupled-document';
import './CkEditor/styles.css';
import UploadAdapter from './CkEditor/UploadAdapter';
function App() {
const editorRef = useRef();
const [images, setImages] = useState([]);
const [post, setPost] = useState({
content:"",
images:[]
});
useEffect(() => {
//이미지 파일 부모 컴포넌트에 업데이트
setPost({ ...post, images });
}, [images])
return (
<div className="App" style={{ alignItems: 'center', display: 'flex', flexDirection: 'column', justifyContent: 'center' }}>
<h2>Using CKEditor 5 build in React</h2>
<div style={{ width: '1000px', height: '500px' }}>
<CKEditor
onReady={editor => {
console.log('Editor is ready to use!', editor);
// Insert the toolbar before the editable area.
editor.ui.getEditableElement().parentElement.insertBefore(
editor.ui.view.toolbar.element,
editor.ui.getEditableElement()
);
editor.plugins.get('FileRepository').createUploadAdapter = (loader) => {
return new UploadAdapter(loader, setImages);
};
editorRef.current = editor;
}}
onError={(error, { willEditorRestart }) => {
if (willEditorRestart) {
editorRef.current.ui.view.toolbar.element.remove();
}
}}
onChange={(event) => console.log(event)}
editor={DecoupledEditor}
data={post.content}
/>
</div>
</div>
);
}
export default App;
-UploadAdapter.js-
export default class UploadAdapter {
    constructor(loader, setImages) {
        this.loader = loader;
        this.setImages = setImages;
    }

    async upload() {
        try {
            const file = await this.loader.file;
            const reader = new FileReader();

            const readPromise = new Promise((resolve, reject) => {
                reader.onload = () => resolve(reader.result);
                reader.onerror = error => reject(error);
            });

            reader.readAsDataURL(file);

            const base64Data = await readPromise;

            //이미지 상태관리
            this.setImages(prevImages => [...prevImages, { id: Date.now(), file, base64: base64Data }]);

            return { default: base64Data };
        } catch (error) {
            console.error('Error uploading image:', error);
            throw error;
        }
    }
};
실제 사용할때는 에디터를 컴포넌트로 따로 만들어 사용했다.
그래서 글작성 부분은 submit부분의 content의 매칭 교체부분에 대한 소스만 적어본다.
if (post.images.length > 0) {
                const formData = new FormData();
                //XSS 공격을 방지하기 위해 데이터 정화
                const cleanHtml = DOMPurify.sanitize(post.content);
                const doc = new DOMParser().parseFromString(cleanHtml, 'text/html');
                const imgElements = Array.from(doc.querySelectorAll('img'));

                const innerImgSrcs = imgElements.map(img => img.src).filter(src => src.startsWith('data:image'));
                //중간에 이미지를 지웠을 수 있기에 content와 images매칭
                const innerImgs = post.images.filter(img => innerImgSrcs.includes(img.base64));

                // FormData 객체에 이미지 파일 추가
                innerImgs.forEach((img,i) => formData.append(`images[${i}]`, img.file));
                const resImgs = await fetchUploadImgs(formData);
                if (resImgs.status !== 200) {
                    alert('이미지 업로드 실패');
                    return;
                }
                //업로드한 이미지의 ids
                const uploadImgs = resImgs.data.images;
                post.imageIds = uploadImgs.map(e => e.F_ID).join(',');

                imgElements.forEach(img => {
                    const matchingImage = innerImgs.find(innerImg => innerImg.base64 === img.src);
                    if (matchingImage === undefined) return;
                    const result = uploadImgs.find(uploadImg => uploadImg.F_NAME === matchingImage.file.name);
                    img.src = result.F_PATH;
                });

                //DOMPurify로 다시 한 번 클리닝 업로드된 이미지로 교체후 content업데이트
                post.content = DOMPurify.sanitize(doc.body.innerHTML);
            }
            post.category = selected.value;

const response = await fetchCreateNotice(post);'React' 카테고리의 다른 글
| React img태그 onError 처리 (0) | 2023.06.16 |
|---|---|
| 리액트에 파이어베이스 사용하기 (0) | 2023.06.12 |
| 리액트 카카오 소셜 로그인 인가 인증까지 하기 (0) | 2023.05.25 |
| [React SEO] 리액트 검색엔진 최적화 해보기 (0) | 2023.04.28 |
| React public에 있는 리소스 사용하기 (0) | 2022.11.01 |


